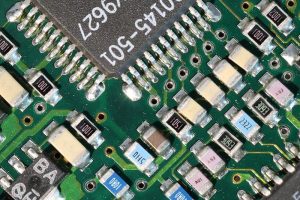
With each passing year, the technological advances we see become more impressive. In the world of PCBs, new technology has paved the way for more powerful computers that are more compact and affordable than previous iterations. This reduction in computer size means that PCBs are being built in smaller configurations.
Beyond compact computers, PCB designers are taking steps to reduce the size of their boards. Whether to fit into smaller gadgets or allow space for more circuitry, smaller boards offer a range of benefits to electronics companies. Below, you can read about ideas from our PCB assembly experts for reducing PCB size without losing critical features.

(2427999 / pixabay)
Methods for board size-reduction
In most cases, the best way to reduce the size of your board is to pay close attention to its layout. By relocating certain components into specific configurations, you can save plenty of surface area, which can then be removed from the design.
If, however, this still does not provide enough of a reduction, you can implement some of the following techniques:
1. Use Smaller Components
The typical PCB uses larger resistors such as the 0805 or 1210. While these are easier to handle during production, they are notorious for taking up more surface area. It’s an obvious solution, but the smaller your components, the less space they take up in the final PCB assembly.
A good plan for reducing your board size is to create your design using these components and then look for smaller replacements. Once you have chosen them, it’s a matter of scaling down your board to fit them.
However, it is important to remember that most smaller components, particularly capacitors, cannot handle the same power yield. Be sure to carefully select your smaller components to be equal in strength to those they are replacing.
2. Go Multi-layer
Most boards produced are single or double-layered. This design choice makes the process of testing and checking installed components easier, but when you shrink down the size of the board, more complications can arise. Routing for smaller components on a smaller board becomes complicated in smaller spaces, even when working with two layers. So why not add another layer or two?
Working with a three- or four-layer board is no more complicated than working with two layers. The only difference is that you need to plan the through-routing of more layers. This solution will free up more space on each board, which will, in turn, reduce the risks of issues such as cross-chatter and component overlap.
Of course, this solution does mean that your boards will be thicker than most. The cost of the additional layers will also add to your production budget, making it a slightly more expensive option. Still, it is an ideal solution if you seek a reduction in the surface area.
3. Use Heavy Copper
The copper layers of your board are intended to help dissipate heat and convey current from component to component, layer to layer. The industry standard for PCB copper layers is weighted at 1 oz, which will handle most functions necessary for an average or larger board. By doubling this amount to 2 oz, you can reduce every trace and layer thickness by half and still handle the same amount of heat and current.
By this logic, the heavier the copper you use, the less of it you will need. Weights of between 4 oz and 10 oz are considered “heavy” by industry standards, so depending on your board’s requirements, these options can be a great way to reduce the size of your board.
Be aware that the weight of the copper will also affect the board itself, so jumping straight from 1 oz to 4 oz may be extreme or detrimental. However, keep in mind that simply doubling up to 2 oz will save you a significant amount of space and allow for a decent reduction in board size.
4. Leave Testing Components Out
The earliest design drafts for any new board will require the addition of extra pads, headers, and testing components to ensure that it will function during a debug test. These parts will themselves take up space and thus increase the size of your board.
With this in mind, another great way to reduce your PCB size is to run extensive tests with these components while everything is at its original size. Once you are sure that everything is running smoothly and correctly, you can remove them from the overall design and shrink down your board to accommodate.
However, this will mean that you cannot use those methods to test your board once you begin mass production, meaning it can be a little risky. But if you can validate the board’s stability through other tests, this can be a quick way to achieve your goals.
5. Switch to Resistor Networks/Stacked Packages
The more components you use in your design, the more space you will use. In traditional boards, designers often use many resistors to help modulate current flow. Some boards can use as many as 16 resistors to handle a single board. This abundance of components will take up a lot of space.
This is where resistor networks come in. A single package-based resistor network can do the work of four or six resistors and only take up a fraction of the space.
A stacked package (or Package on Package system) combines two or more packages into a single block, one on top of the other. This will allow you to use multiple components but use only the space of one. Similarly, you can also use stacked packages to help reduce the horizontal space used by single components.
The downside to these is the components’ verticality. Your designs will have to consider the taller nature of these components, much as you would with a multi-layered board, so bear this in mind.
Conclusion
The future of PCBs is tiny and bright. With a little pre-planning and engineering, you can work to shrink your PCBs and prepare them for the devices of tomorrow. Keep these suggestions in mind as you design a PCB or work with a PCB assembly company, and you’ll find yourself at the forefront of industry evolution.
Video

